Deliciously Easy Plum Crumble Bars – A Treat You’ll Love!
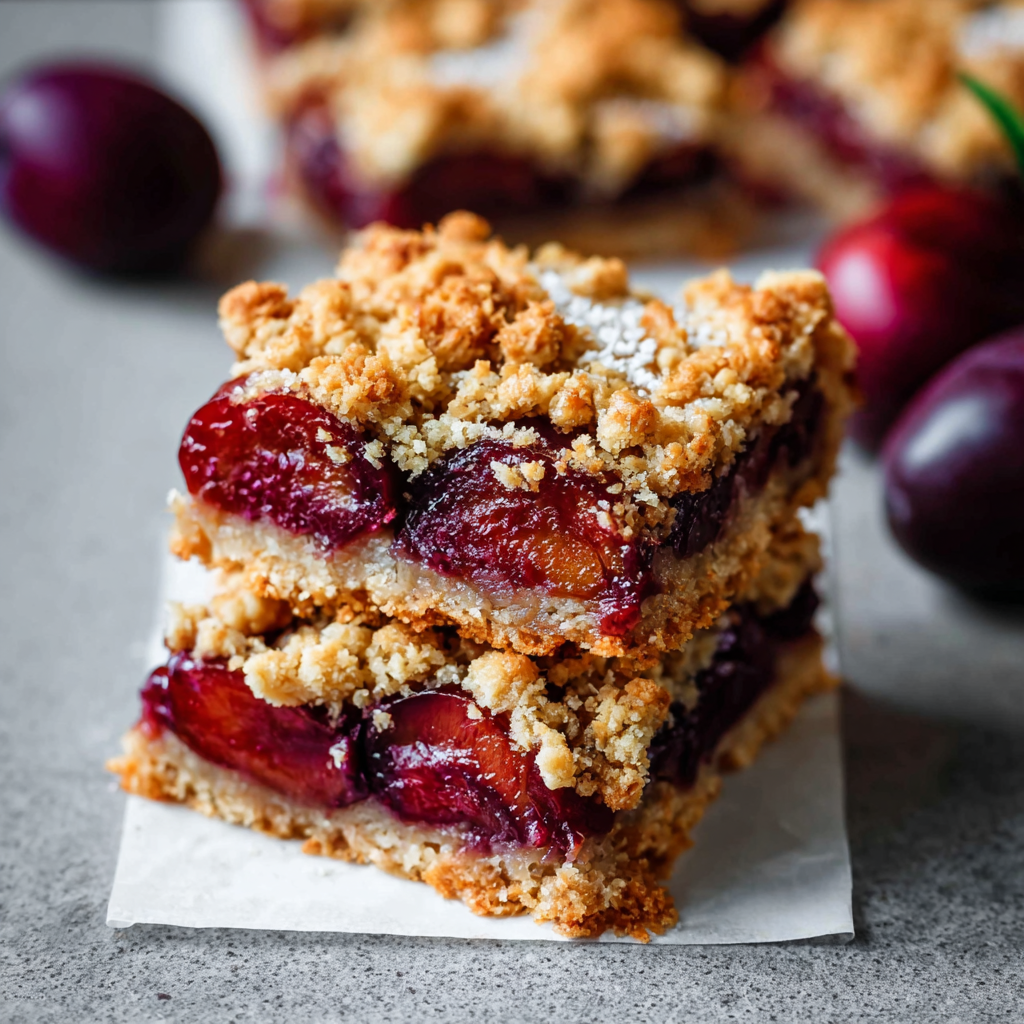
Hello there, my fellow food enthusiasts! If you’re looking for a cozy and comforting dessert that showcases the vibrant flavors of summer fruit, you’re in for a treat with these Easy Plum Crumble Bars. They have a jammy plum filling topped with a buttery oat crumble that’s simply irresistible. Let me tell you, once you try this recipe, you might just find yourself making it again and again—trust me, it’s that good!
Nutritional Benefits
Did you know that plums aren’t just delicious, but they also come with great health benefits? They’re packed with vitamins and antioxidants, particularly vitamin C, which helps boost our immune systems. Plus, the fiber from the plums and oats can aid in digestion, making these crumble bars a delightful snack without too much guilt! And with the oats included, you’re getting some heart-healthy benefits too. Isn’t it great when dessert can be a little bit good for you?
Adaptable Variations
- Fruit Swaps: Feeling adventurous? You can swap out the plums for other fruits like peaches, apples, or even berries! Each fruit will bring its own unique flair to the bars.
- Gluten-Free Option: For my gluten-sensitive friends, try using gluten-free flour in place of all-purpose flour. This minor switch still yields delicious results!
- Sweetness Control: If you’re watching your sugar intake, feel free to use a sugar substitute like honey or maple syrup. Just remember to adjust the amount accordingly based on the sweetness level you desire.
Let’s Get Baking! Easy Plum Crumble Bars Recipe
Ingredients
- 4 cups pitted and sliced plums
- 1 cup granulated sugar
- 1 tablespoon lemon juice
- 1 teaspoon cinnamon
- 1 ½ cups all-purpose flour
- 1 cup rolled oats
- ½ teaspoon baking powder
- ½ teaspoon baking soda
- ½ teaspoon salt
- 1 cup unsalted butter, melted
- 1 tablespoon vanilla extract
Cooking Instructions
- First things first—preheat your oven to 350°F (175°C). You can either grease a 9×13-inch baking pan or line it with parchment paper. I love using parchment paper because it makes removing the bars so much easier!
- Now, grab a mixing bowl and combine your sliced plums, granulated sugar, lemon juice, and cinnamon. Give it a good stir to coat those plums evenly and let them hang out for about 10 minutes. This step allows the plums to release their natural juices!
- In another large bowl, whisk together the flour, rolled oats, baking powder, baking soda, and salt. This is where the magic happens to create that wonderful crumble topping!
- Next, pour your melted butter and vanilla extract into that dry mixture and mix until everything comes together in a crumbly texture.
- Take about 1 cup of the oat mixture and set it aside as a crumble topping. Press the remaining mixture firmly into the bottom of your prepared baking pan—this will form the delicious crust.
- Spread that fragrant plum mixture evenly over the crust. Make sure the plums are nicely distributed for even flavor in every bite.
- Now, sprinkle the reserved oat crumble mixture generously over the top of the plum filling. It’s going to be so good!
- Pop that pan into the oven and bake for about 35-40 minutes. Keep an eye on it until the top is golden brown and the fruit is bubbling away!
- Once done, let it cool in the pan on a wire rack for at least 30 minutes. I know it’s tough to resist, but this makes cutting it into bars a breeze!
- Slice into bars and serve! If you’re feeling extra cheeky, drizzle with additional melted butter or dust with powdered sugar for a fancy touch.
Practical & Valuable Tips
- Serving: These bars are delightful served warm, but they are just as delicious at room temperature or even chilled!
- Storage: Store any leftovers in an airtight container at room temperature for up to 3 days. If you want them to last longer, you can refrigerate them.
- Freezing: If you want to save some for later, they freeze beautifully! Just wrap them in plastic wrap and store in an airtight container. Make sure to thaw before enjoying again.
- Flavor Enhancements: Consider adding a pinch of nutmeg along with the cinnamon for an extra layer of flavor or even toss in some chopped nuts in your filling for extra crunch!
- Cutting Tips: For cleaner slices, use a sharp knife-warmed under hot water, then dried off. This helps in getting through the crumb without too much mess!
Equipment Needed
Here’s what you’ll need to whip up these delicious bars:
- 9×13-inch baking pan
- Mixing bowls
- Measuring cups and spoons
- Whisk for dry ingredients
- Spatula for mixing
- Wire rack for cooling
Frequently Asked Questions
- Can I use frozen plums instead of fresh? Yes! Just make sure to thaw them and drain excess liquid before mixing.
- How do I know when the bars are done baking? Look for a golden top and bubbling fruit; a toothpick should come out with some moist crumbs, but not wet batter.
- Can I use brown sugar instead of granulated sugar? Definitely! Brown sugar will give your bars a deeper flavor, but watch the moisture as it may change baking time slightly.
- What if I don’t have vanilla extract? If you’re out of vanilla, you could use almond extract for a unique flavor or even leave it out altogether.
- Are these bars good for meal prep? They are fantastic for meal prep! Make a batch at the start of the week and grab them as a sweet snack or dessert throughout the week.
Have you made these scrumptious plum crumble bars? I’d love to hear how they turned out for you! Feel free to drop your comments below or share your creations on Pinterest. Let’s spread the delicious joy!