Hello, Chicken Tender Lovers!
Hi there! Are you ready to make some juicy, crispy chicken tenders that are sure to make your taste buds dance? I can’t tell you how many times I’ve craved takeout, only to realize that making them at home is not only fun but also so much better for you! Plus, there’s something incredibly satisfying about biting into a perfectly crunchy piece of chicken. So, let’s dive right in!
Nutritional Benefits of Chicken Tenders
Let me start by sharing a bit about the good stuff in this dish! Chicken tenders are primarily made of lean chicken breast, which is high in protein and low in fat. Protein is essential for our bodies as it helps repair muscles and maintain healthy organs. Using olive oil in the marinade adds healthy fats, and the spices (like paprika and garlic) not only enhance flavor but can also have some anti-inflammatory properties. Overall, these chicken tenders can be a deliciously balanced meal when paired with a fresh salad or some roasted veggies!
Adaptable Variations
- Gluten-Free Option: Swap out the all-purpose flour with a gluten-free flour blend, and use gluten-free corn flake crumbs.
- Spice Level: If you’re a spice lover, increase the cayenne pepper for a kick, or add some hot sauce to the marinade for an extra flavor punch.
- Herbed Chicken Tenders: Mix in some dried herbs like thyme or oregano into the breadcrumb mixture for an aromatic twist.

Let’s Get Cooking! Crispy Chicken Tenders Recipe
Ingredients You’ll Need
- For the chicken tenders:
- 1 lb chicken breast, cut into strips
- 1/4 cup olive oil
- 1/4 cup pickle juice
- 1 tsp paprika
- 1/2 tsp cayenne pepper
- 1 tsp garlic powder
- Salt and pepper, to taste
- For the wet batter:
- 1 egg
- 1/2 cup all-purpose flour
- 2 tbsp water
- 1/2 tsp cayenne pepper
- 1/2 tsp garlic powder
- Salt and pepper, to taste
- For the dredging station:
- 1 cup all-purpose flour
- 1 cup corn flake crumbs
- 1/2 tsp cayenne pepper
- 1/2 tsp garlic powder
- Salt and pepper, to taste
- Vegetable oil for frying
- Fresh chives, chopped (for garnish)
Step-by-Step Instructions
- Marinate the Chicken: In a mixing bowl, combine the olive oil, pickle juice, paprika, cayenne pepper, garlic powder, salt, and pepper. Add the chicken strips and toss until well-coated. Cover and refrigerate for at least 30 minutes to let those flavors seep in.
- Prepare the Wet Batter: In a shallow dish, whisk together the egg, all-purpose flour, water, cayenne pepper, garlic powder, and salt/pepper until smooth.
- Set Up the Dredging Station: In another shallow dish, mix the all-purpose flour, corn flake crumbs, cayenne pepper, garlic powder, salt, and pepper. This mix is the secret to that delicious crunch!
- Heat the Oil: In a large skillet, pour about 1/2 inch of vegetable oil and heat over medium until hot (you want it to be around 350°F or 175°C, but a drop of the batter bubbling when tested shows it’s ready).
- Dredge the Chicken Strips: Take each marinated strip, dip it in the wet batter, letting it drip off, then coat it in the dredging mixture. Press lightly to ensure it’s nicely covered.
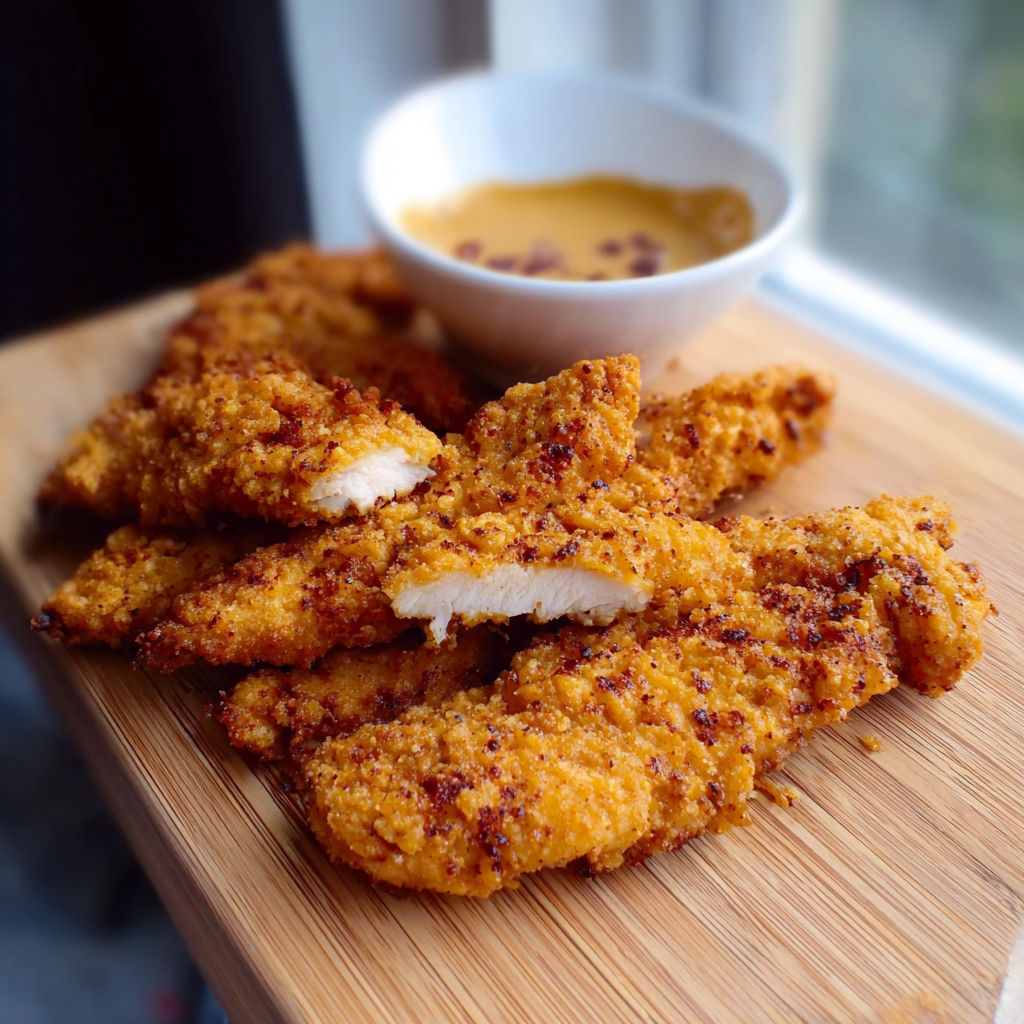
- Fry the Chicken: Place the coated strips in the hot oil, frying them in batches if necessary. Cook for 3-4 minutes on one side, flip and fry for another 3-4 minutes until golden brown and crispy. No overcrowding now!
- Drain Excess Oil: Once cooked, transfer your tenders to a plate lined with paper towels to soak up any excess oil.
- Garnish and Serve: Sprinkle those crispy chicken tenders with fresh chives and serve them hot with your favorite dipping sauce. I often go for honey mustard or barbecue sauce—both delightful!
Practical & Valuable Tips
- Want to keep your tenders extra crispy? Let them sit for a minute before serving to let the steam escape.
- Store any leftovers in an airtight container in the refrigerator for up to 3 days. Reheat them in the oven to maintain crispiness.
- If you’re making a larger batch, keep the cooked tenders warm in a 200°F (93°C) oven while you finish frying the rest!
Equipment Needed
Here’s a quick list of what you’ll need while making these delicious tenders:
- A sharp knife and cutting board for prepping the chicken
- Bowls for mixing marinades, batters, and dredging
- A whisk for smooth batter
- A large skillet or frying pan
- A pair of tongs for flipping the chicken safely
- A plate lined with paper towels for draining cooked tenders
Frequently Asked Questions
- Can I use chicken thighs instead of breasts? Absolutely! Chicken thighs will give you extra juiciness since they are a little fattier.
- What if I don’t have pickle juice? No worries! You can substitute with buttermilk or even a splash of vinegar diluted in water.
- Can I bake these instead of frying? Yes! For baked versions, drizzle with oil and bake at 425°F (220°C) for about 20 minutes, flipping halfway through.
- How do I know when the chicken is cooked through? The internal temperature should reach 165°F (75°C). A meat thermometer is a good tool for this!
- Can I reheat the leftovers? Yes! For the crispiest results, reheat them in the oven at 350°F (175°C) for about 10 minutes.
Your Turn to Shine!
I hope you enjoy making these amazing chicken tenders at home just as much as I do! Feel free to share your experience or even a photo on Pinterest—we’d love to see how yours turned out! Happy cooking!