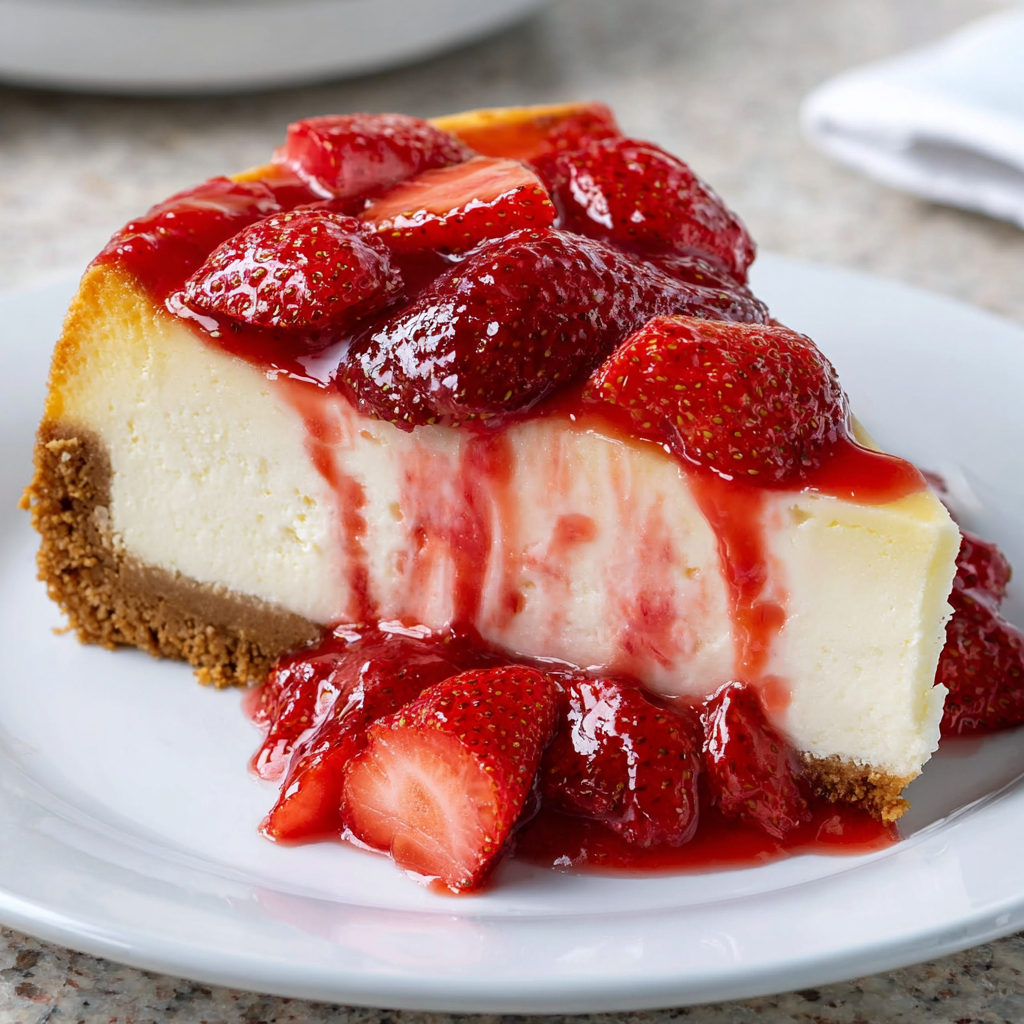
Hey there, dessert lovers! Are you ready to elevate your cheesecake game? I’m super excited to share my ultra-creamy strawberry cheesecake recipe with you. It’s rich, velvety, and topped with a delicious homemade strawberry sauce that will have everyone coming back for seconds. I mean, who can resist a slice of creamy cheesecake adorned with fresh strawberries? Let’s dive right into this delightful dessert!
Nutritional Benefits of Cheesecake
While cheesecake is definitely a treat, it does offer some benefits too! For starters, the cream cheese in the filling provides calcium and protein, which are essential for our bodies. If you use fresh strawberries in the topping, you’re also adding vitamin C, which can boost your immune system and improve skin health. So, while we’re enjoying this dessert, let’s feel good knowing there are some nutritious aspects in this indulgence!
Fun Variations to Try
- Use Different Fruits: If strawberries aren’t your thing, try using raspberries, blueberries, or peaches for the topping. The cheesecake itself is fantastic with any fruit flavors!
- Gluten-Free Option: Swap the graham cracker crumbs for almond flour or gluten-free cookies to make a crust that everyone can enjoy.
- Chocolate Lovers Unite: If you’re a chocoholic, add cocoa powder to the batter, or drizzle some melted chocolate over the top instead of strawberry sauce.
Ultra-Creamy Strawberry Cheesecake Recipe
Ingredients
- For the Crust:
- 2 cups graham cracker crumbs (about 2 sleeves)
- 2 tablespoons granulated sugar
- 1/4 cup unsalted butter, melted
- For the Filling:
- 4 (8-ounce) packages cream cheese, softened
- 1 1/4 cups granulated sugar
- 2 tablespoons cornstarch
- 4 large eggs + 1 yolk
- 1/2 cup sour cream
- 1/4 cup heavy cream
- 1 tablespoon vanilla extract
- 6 cups water (for the water bath)
- For the Strawberry Topping:
- 1/2 cup granulated sugar
- 1 tablespoon cornstarch
- 1 tablespoon lemon juice
- 2 pounds fresh strawberries, hulled and finely chopped, divided
Instructions
- Preheat the oven to 350°F (175°C) and line the bottom of a 9-inch springform pan with parchment paper.
- Lay 4 sheets of aluminum foil on a flat surface in a cross/star pattern. Place the springform pan in the center and wrap the foil tightly around the pan to prevent any water seepage.
- In a medium bowl, combine the graham cracker crumbs, granulated sugar, and melted butter. Mix until the crumbs are evenly moistened.
- Pour the crumb mixture into the prepared springform pan. Use a measuring cup or the bottom of a glass to firmly press the crumbs into the bottom and about 3/4 of the way up the sides of the pan.
- Bake the crust in the preheated oven for about 8 minutes or until it’s golden brown. Remove from the oven and set aside to cool. Raise the oven temperature to 400°F (200°C).
- In a large mixing bowl, use an electric mixer to beat the softened cream cheese on medium speed until it’s smooth and lump-free (about 1 minute). Make sure to scrape down the sides and bottom of the bowl occasionally.
- Gradually add in the granulated sugar and cornstarch, beating on medium speed until the mix is smooth and fluffy (around 2 minutes). Remember to scrape the sides of the bowl as needed!
- Add the eggs and the additional yolk into the mixture, beating on low speed until well combined.
- Gently stir in the sour cream, heavy cream, and vanilla extract with a spatula until just combined—it’s okay if it looks a bit chunky!
- For the water bath: Boil about 6 cups of water. Place the baked crust-filled springform pan inside a larger roasting pan. Pour the filling over the crust, then carefully pour hot water into the outer pan, surrounding the springform pan, until it reaches halfway up the sides of the springform pan.
- Bake in the oven for 10 minutes, then reduce the temperature to 230°F (110°C) and let it bake for 1 more hour. Be patient, and don’t peek inside the oven during this time!
- After 1 hour, turn off the oven and slightly open the door, allowing the cheesecake to cool inside for another hour.
- Once cooled on the counter, transfer the cheesecake to the fridge and let it chill for at least 8 hours, or overnight is even better.
- While waiting, prepare the strawberry topping: In a medium saucepan, combine half of the hulled and sliced strawberries with the granulated sugar, lemon juice, and cornstarch. Cook on medium heat until the sugar dissolves and the sauce thickens, stirring constantly.
- Remove the saucepan from heat, and stir in the remaining chopped strawberries. Let this cool, then place it in the fridge until you’re ready to use it.
- When the cheesecake is set, carefully remove it from the springform pan and place it onto a serving plate. Stir the strawberry sauce, then pour it over the top evenly.
- Serve with a dollop of fresh whipped cream, and enjoy your delicious creation!
Practical & Valuable Tips
- Let the cheesecake cool slowly to avoid cracks—patience is key!
- For easier slicing, dip your knife in hot water before cutting the cheesecake.
- It’s best to store leftovers in an airtight container in the fridge. The cheesecake will last about a week (if it lasts that long!).
- You can prepare the strawberry topping a day in advance for convenience.
- This cheesecake is also great frozen! Just wrap it tightly in plastic wrap and store it in the freezer for up to 2 months.
Equipment Needed
Here’s a quick checklist of what you’ll need:
- A 9-inch springform pan
- Mixing bowls (medium and large)
- An electric mixer
- A measuring cup and spoons
- A spatula for folding and mixing
- A large roasting pan for the water bath
- Aluminum foil for wrapping the pan
- A medium saucepan for the topping
Frequently Asked Questions
- Can I make this cheesecake ahead of time? Absolutely! It’s perfect for making a day or two in advance.
- What if I don’t have a springform pan? You can use a regular cake pan, just be aware that removing it may be a bit trickier.
- Can I skip the water bath? While you can bake it without one, the water bath helps prevent cracking by ensuring even baking.
- How do I know when my cheesecake is done? The edges should be set, but the center may still jiggle slightly. It will continue to firm up as it cools.
- Can I use frozen strawberries for the topping? Yes, but make sure to thaw and drain them well before using!
Did you try making this ultra-creamy strawberry cheesecake? I can’t wait to know how it turned out! Feel free to share your thoughts and any creative twists you added! You can also follow me on Pinterest for more delicious recipes like this one. Happy baking!