Welcome to the Sweetest Dessert Adventure!
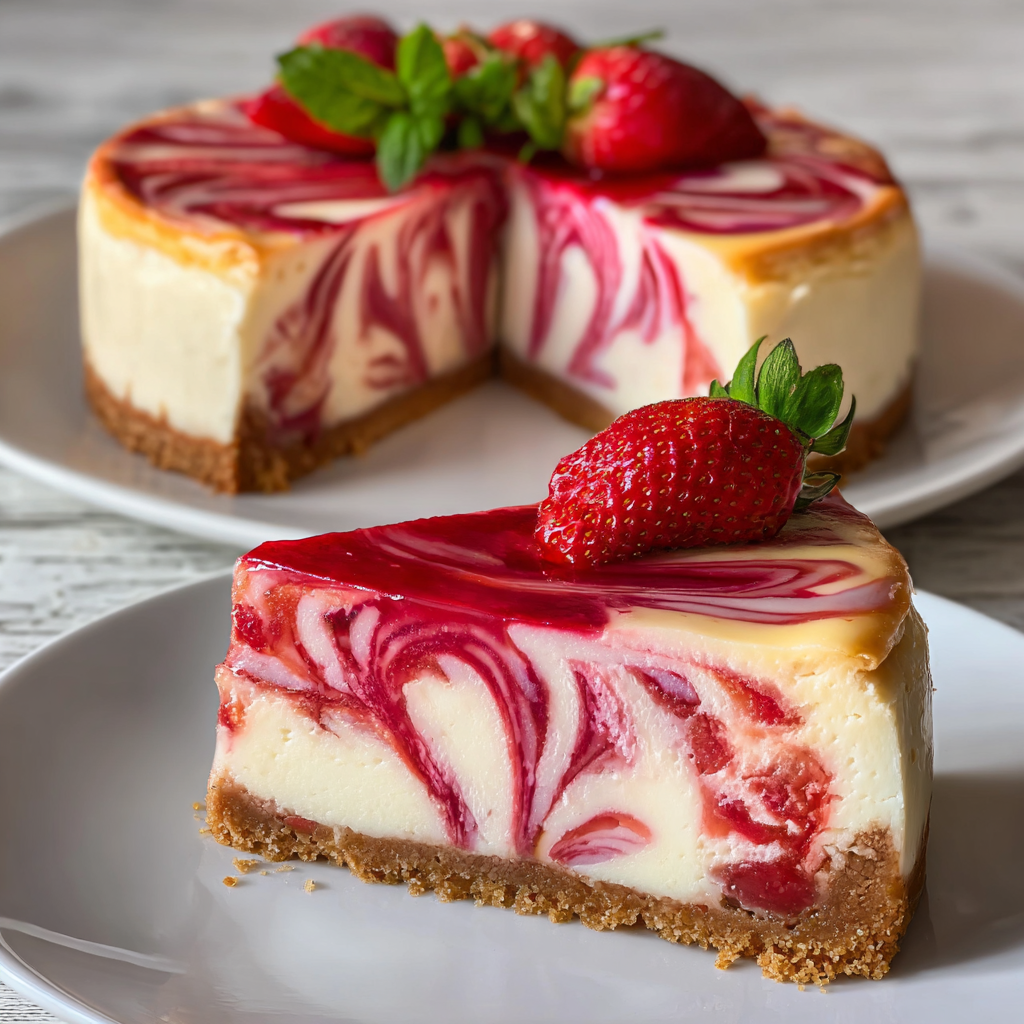
Hey there! If you’re a cheesecake lover like me, you’re in for a real treat today because we’re diving into the world of Strawberry Swirl Cheesecake. Imagine creamy cheesecake with a delightful swirl of fresh strawberries—sounds irresistible, right? This dessert is perfect for any occasion, whether it’s a cozy night in, a get-together with friends, or a celebration that deserves something fabulous. Let’s get started, shall we?
Nutritional Benefits of Strawberry Cheesecake
While cheesecake might feel like a guilty pleasure, it does have its perks! First, cream cheese is a source of calcium, which is great for strong bones. Plus, strawberries are not only delicious, but they’re also packed with antioxidants, vitamins, and fiber. They can help boost your immune system and keep your skin looking great! And if you use the right ingredients and go easy on the sugar, you can enjoy this dessert without all the guilt. It’s all about balance, right?
Fun Variations to Try!
- Berry Mix-Up: Instead of just strawberries, why not try adding blueberries or raspberries in the swirl? A mixed-berry swirl cheesecake would be absolutely stunning and wonderfully fruity!
- Gluten-Free Option: If you need a gluten-free version, you can easily swap out graham cracker crumbs for gluten-free cookies or almond flour to make the crust.
- Chocolate Lovers Unite: Drizzle some chocolate ganache over the top or add chocolate chips into the cheesecake mixture for a decadent twist!
Let’s Make Strawberry Swirl Cheesecake!
Ingredients
- 1 ½ cups graham cracker crumbs
- ½ cup unsalted butter, melted
- 1 cup granulated sugar, divided
- 3 (8-ounce) packages cream cheese, softened
- 1 teaspoon vanilla extract
- 3 large eggs
- 1 cup sour cream
- 1 ½ cups fresh strawberries, hulled and sliced
- 2 tablespoons cornstarch
- ¼ cup water
- Mint leaves for garnish
Step-by-Step Instructions
- Preheat the Oven: Go ahead and preheat your oven to 325°F (160°C) so it’s nice and ready for your cheesecake magic!
- Prepare the Crust: Grab a mixing bowl and combine your graham cracker crumbs with the melted butter. Mix it all up until the crumbs are coated. Then, press this mixture down firmly into the base of a 9-inch springform pan creating an even layer. Set this aside for later.
- Make the Strawberry Swirl: In a small saucepan, combine your sliced strawberries, 2 tablespoons of sugar, cornstarch, and the water. Cook over medium heat, stirring occasionally, until it starts to bubble and thicken—about 5 minutes. Take it off the heat and allow it to cool a bit.
- Prepare the Cheesecake Filling: In a big mixing bowl, beat the softened cream cheese with the remaining ¾ cup of sugar until it’s creamy and smooth. Mix in the vanilla extract until everything is well combined.
- Add Eggs: Now, it’s time to integrate the eggs! Add them one at a time, ensuring each egg is mixed in before adding the next one. Don’t forget to scrape down the sides of the bowl for good measure!
- Add Sour Cream: Gently fold in the sour cream until the mixture is silky smooth and combined.
- Assemble the Cheesecake: Start by pouring half of your cream cheese mixture over your prepared crust in the springform pan. Then, drop spoonfuls of the strawberry mixture onto the cream cheese layer. After that, pour the remaining cream cheese mixture on top, and finish it off with more strawberry mixture.
- Create Swirls: This is where the fun begins! Grab a knife or skewer and gently swirl the strawberry mixture into the cream cheese. You want to create a beautiful marbled effect—no perfection needed, just some artistic flair!
- Bake the Cheesecake: Place your springform pan in the oven and let it bake for 55-65 minutes. Look for the edges to be golden and the center to be slightly jiggly.
- Cool and Chill: Once baked, turn off the oven, crack the door open, and let it cool in there for an hour. Then, move it to the fridge and chill for at least 4 hours, or overnight if you can resist!
- Serve: Before serving, top with fresh strawberries and mint leaves for a gorgeous presentation! Carefully remove the cheesecake from the springform pan, slice it up, and enjoy every creamy, fruity bite!
Practical Tips for a Perfect Cheesecake
- Want to avoid cracks? Let your cheesecake cool slowly by leaving it in the oven for a bit after baking, as mentioned above.
- If it’s a warm day, consider using a water bath for even baking for extra creaminess and to help prevent cracking.
- Store leftovers in the fridge in an airtight container so they stay lovely for your next dessert craving!
Equipment You’ll Need
Here’s a quick rundown of what you’ll find helpful for making your cheesecake:
- A 9-inch springform pan (the magic for easy release!)
- A mixing bowl set (for getting everything mixed together smoothly)
- A saucepan (for that luscious strawberry swirl)
- A rubber spatula (to ensure no batter goes to waste!)
- A knife or skewer (for swirling the berry goodness)
- An electric mixer (for silky smooth cream cheese mixture)
Frequently Asked Questions
- Can I use frozen strawberries? Yes! Just thaw them and drain excess water before using.
- How can I tell when the cheesecake is done? It should be set around the edges but slightly jiggly in the center.
- What if my cheesecake cracks? Don’t worry! The taste will still be fabulous. If you want, you can cover the cracks with more strawberry swirl or whipped cream!
- Can I freeze the cheesecake? Yes, you can freeze it! Just make sure to wrap it tightly and it’ll be fine for up to 3 months.
- How long does the cheesecake last in the fridge? If stored properly, your cheesecake can last about 5-7 days in the fridge.
Let’s Connect!
So, what do you think? Are you ready to whip up this show-stopping Strawberry Swirl Cheesecake? I’d love to see how yours turns out! Snap a pic and share it on Pinterest or tag me! Happy baking, and don’t hesitate to reach out if you have any questions or ideas!