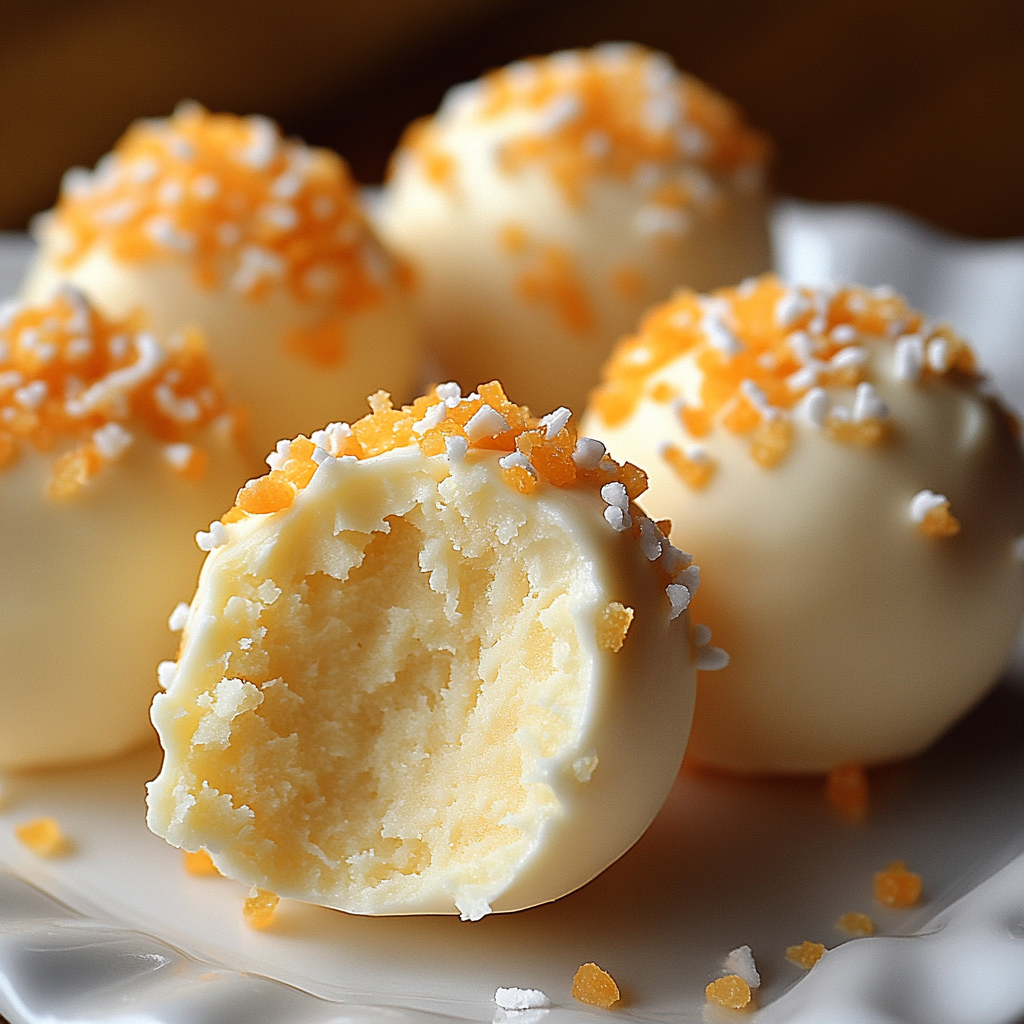
Welcome to a Zestful Treat: No Bake Orange Creamsicle Truffles!
Hey there! If you’re anything like me, you love those delightful summer treats that bring a smile to your face. Today, I’m so excited to share these No Bake Orange Creamsicle Truffles with you! They are creamy, dreamy, and bursting with that sweet citrus flavor that’s reminiscent of a warm, sunny day. What’s even better? You can whip them up without ever turning on the oven. Perfect, right?
Nutritional Benefits of these Delightful Bites
Let’s chat about the good stuff! These truffles include cream cheese, which is a fabulous source of calcium and protein, helping to keep those bones strong. Plus, with fresh orange juice and zest, you’re getting a nice punch of Vitamin C, which can help boost your immune system. And we can’t forget about the fun factor—these little bites can bring joy to any gathering and encourage you to enjoy treats in moderation!
Fun and Adaptable Variations
- Chocolate Lovers: If you’re a big fan of chocolate, try dipping these truffles in dark chocolate instead of white chocolate. The combination of flavors will knock your socks off!
- Vegan Version: You can swap out the cream cheese for a vegan cream cheese alternative, and use dairy-free chocolate chips to create a tasty plant-based treat!
- Fun Flavors: Why not experiment with different flavors? Try using lemon juice instead of orange for a tangy twist, or mix in some almond extract for a nutty vibe!
Delicious No Bake Orange Creamsicle Truffles Recipe
Ingredients
- 8 oz cream cheese, softened
- 4 cups powdered sugar
- 1 cup crushed vanilla wafer cookies
- 1/4 cup orange zest
- 1/4 cup fresh orange juice
- 1 tsp vanilla extract
- 12 oz white chocolate chips
- 1 tbsp vegetable oil (for thinning chocolate, if necessary)
- Orange sprinkles (for decoration)
Instructions
- In a large mixing bowl, combine the softened cream cheese, powdered sugar, crushed vanilla wafers, orange zest, fresh orange juice, and vanilla extract.
- Use an electric mixer to blend the ingredients together until the mixture is smooth and creamy.
- Once combined, cover the bowl and refrigerate the mixture for about 30 minutes to firm up.
- After chilling, scoop out small portions of the mixture and roll them into bite-sized balls (about 1 inch in diameter). Place the balls on a lined baking sheet.
- Once all balls are formed, place the baking sheet back in the refrigerator to chill for an additional 30 minutes.
- While the truffle balls are chilling, melt the white chocolate chips in a microwave-safe bowl in 30-second intervals, stirring in between, until smooth and fully melted.
- If the melted chocolate is too thick, stir in a tablespoon of vegetable oil to achieve a dipping consistency.
- Remove the truffle balls from the refrigerator. Carefully dip each ball into the melted white chocolate using a fork, making sure they are fully coated.
- Lift the truffle out, allowing excess chocolate to drip back into the bowl, then place it back onto the lined baking sheet.
- While the chocolate is still wet, sprinkle orange sprinkles on top of each truffle for decoration.
- Once all truffles are coated and decorated, place them back in the refrigerator to set for at least 30 minutes.
- After the chocolate has hardened, serve the truffles chilled or at room temperature for a delightful citrus dessert experience. Enjoy!
Practical & Valuable Tips
- Storage: Store your truffles in an airtight container in the fridge to keep them fresh for up to a week—if they last that long!
- Serving: These truffles are perfect for parties! You can place them on a cute platter and watch your friends and family dig in.
- If you’re making these for a gathering, consider labeling them as “Orange Creamsicle Truffles” so everyone knows what deliciousness awaits them!
Equipment Needed
Here’s a handy list of what you’ll need to get these sweet treats made:
- A large mixing bowl
- An electric mixer (or a good old-fashioned whisk if you’re feeling ambitious!)
- A lined baking sheet for the truffles
- A microwave-safe bowl for melting chocolate
- A fork for dipping the truffles
- A spatula to help with mixing and serving
Frequently Asked Questions
- Can I make these truffles ahead of time? Absolutely! You can prepare them a couple of days in advance, just store them properly in the fridge.
- Can I freeze these truffles? Yes! Feel free to freeze them, too! Just wrap them tightly in plastic wrap and store in an airtight container for up to 3 months.
- What if I don’t have white chocolate chips? You can substitute with yogurt chips or even use a different type of chocolate; just remember that it will change the flavor a bit!
- How long can I keep these truffles? When stored in the refrigerator, they’ll stay fresh for about a week. But I doubt they’ll last that long!
- Can I use a different fruit juice? Yes! Feel free to get creative! Lemon or lime juice can give a refreshing twist, just adjust the sugar slightly to balance the tartness.
Let’s Connect!
I hope you enjoy making these delightful No Bake Orange Creamsicle Truffles as much as I do! They are a perfect treat for any occasion. If you whip up a batch, I would love to hear how they turned out! Share your experience with me, and don’t forget to follow me on Pinterest for more fun, easy recipes to brighten up your kitchen.