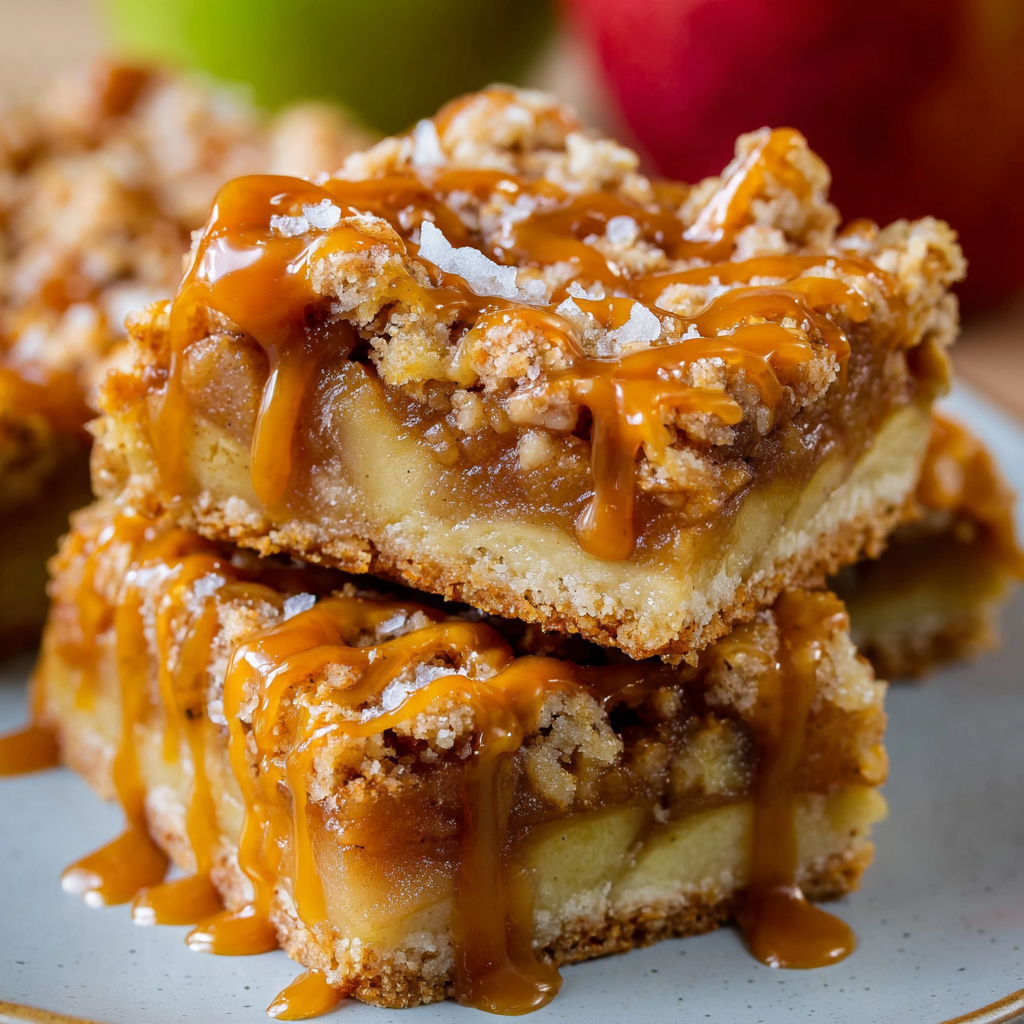
Welcome to the Cozy World of Salted Caramel Apple Bars!
Hey there! If you’re looking for the perfect fall dessert to warm your soul and satisfy your sweet tooth, you’ve landed in the right place. Let me tell you about these irresistible Salted Caramel Apple Bars that are not only delicious but also incredibly easy to whip up. Honestly, every time I make them, my kitchen fills with the delightful aroma of baked apples and sweet caramel—I just can’t get enough!
Nutritional Benefits of These Delightful Bars
Okay, let’s chat about some of the healthier aspects of these bars (yes, desserts can have their perks!). First, apples are packed with fiber, which is great for digestion. Plus, they contain vitamins A and C, which keep your immune system happy—especially during the fall! If you’re using nuts like pecans or walnuts, you’re also getting healthy fats and a great crunch. So, while we’re indulging in caramel goodness, there’s a little nod to health tucked in there too!
Adaptable Variations to Consider
- Gluten-Free Option: Substitute all-purpose flour with a gluten-free flour blend, and you’ll have a delicious version that fits your dietary needs.
- Nut-Free Version: If you’re allergic or prefer to skip nuts, just leave them out or replace them with seeds like pumpkin or sunflower seeds for that extra crunch!
- Extra Fruity: Instead of just apples, feel free to mix in some diced pears or even cranberries for a bit of tartness.
Your Go-To Recipe for Salted Caramel Apple Bars
Ingredients
- 2 cups all-purpose flour
- 1 cup rolled oats
- 1 cup brown sugar, packed
- 1/2 cup granulated sugar
- 1/2 cup unsalted butter, softened
- 1/2 teaspoon baking soda
- 1/2 teaspoon salt
- 2 cups peeled and diced apples (Granny Smith or Honeycrisp works great)
- 1 teaspoon ground cinnamon
- 1/4 teaspoon ground nutmeg
- 1/2 cup caramel sauce (plus extra for drizzling later)
- 1/2 cup chopped pecans or walnuts (optional)
- Sea salt for sprinkling on top
Step-by-Step Instructions
- Preheat the Oven: Start by preheating your oven to 350°F (175°C). Grease a 9×13 inch baking dish or line it with parchment paper—either works!
- Prepare the Crust: In a large mixing bowl, combine the flour, rolled oats, brown sugar, granulated sugar, baking soda, and salt. Mix it all together until combined.
- Add Butter: Next, mix in the softened butter. Your mixture should look like coarse crumbs. You can use a pastry cutter or just your fingers—whatever feels good!
- Reserve Topping: Set aside about 1 cup of this crumb mixture for later. Then, firmly press the remaining mixture into the bottom of your prepared baking dish to form the crust.
- Prepare the Apple Filling: In another bowl, toss your diced apples with cinnamon, nutmeg, and those optional chopped nuts. Spread this mixture evenly over the crust.
- Add Caramel: Now it’s time for a sweet touch! Drizzle half of your caramel sauce over the apple layer, ensuring it’s well-distributed.
- Top with Crumble: Sprinkle the reserved crumb mixture over the top of the apples and caramel—this is the magic topping that brings it all together.
- Bake the Bars: Bake in the oven for about 30-35 minutes until your topping looks golden brown and your apples feel tender.
- Cool and Drizzle: Once out of the oven, let the bars cool completely in the pan. After they’re cooled, take that remaining caramel and drizzle it over the top, finishing with a pinch of sea salt.
- Cut and Serve: Now, cut the bars into squares, serve, and enjoy your cozy dessert!
Practical & Valuable Tips
- To keep your bars fresh, store them in an airtight container at room temperature. They’ll stay delectable for about a week!
- If you want to serve them warm, pop them in the microwave for a few seconds before drizzling with caramel. It truly enhances the flavor!
- Feeling extra generous? Package them up and share with friends—who wouldn’t love a homemade treat?
Equipment Needed
Before you hop into baking, here’s a handy list of what you’ll need:
- A 9×13 inch baking dish (greased or lined with parchment paper)
- Your favorite mixing bowls
- A pastry cutter or simply your hands for mixing
- A measuring cup and spoons for precision
- A spatula to spread the filling evenly
- A cutting board and knife for slicing the bars
Frequently Asked Questions
- Can I use frozen apples? Yes, you can use frozen apples. Just make sure to thaw and drain any excess moisture before using!
- Can I make these bars vegan? Absolutely! Substitute the butter with a plant-based alternative and use a vegan caramel sauce!
- How do I know when the bars are done? Look for a golden brown topping, and if you insert a toothpick, it should come out clean (with no wet batter).
- Can I freeze these bars? Yes! Wrap them tightly and store in the freezer for up to 3 months. Thaw them at room temperature before serving.
- Why did my crust come out too crumbly? If your crust is too crumbly, it might need a bit more moisture. Next time, try adding a splash of milk or water as needed.
I can’t wait to hear how your Salted Caramel Apple Bars turned out. They’re seriously a hit! If you loved this recipe, don’t forget to follow me on Pinterest for more tasty treats and cozy recipes to keep your kitchen buzzing with joy!