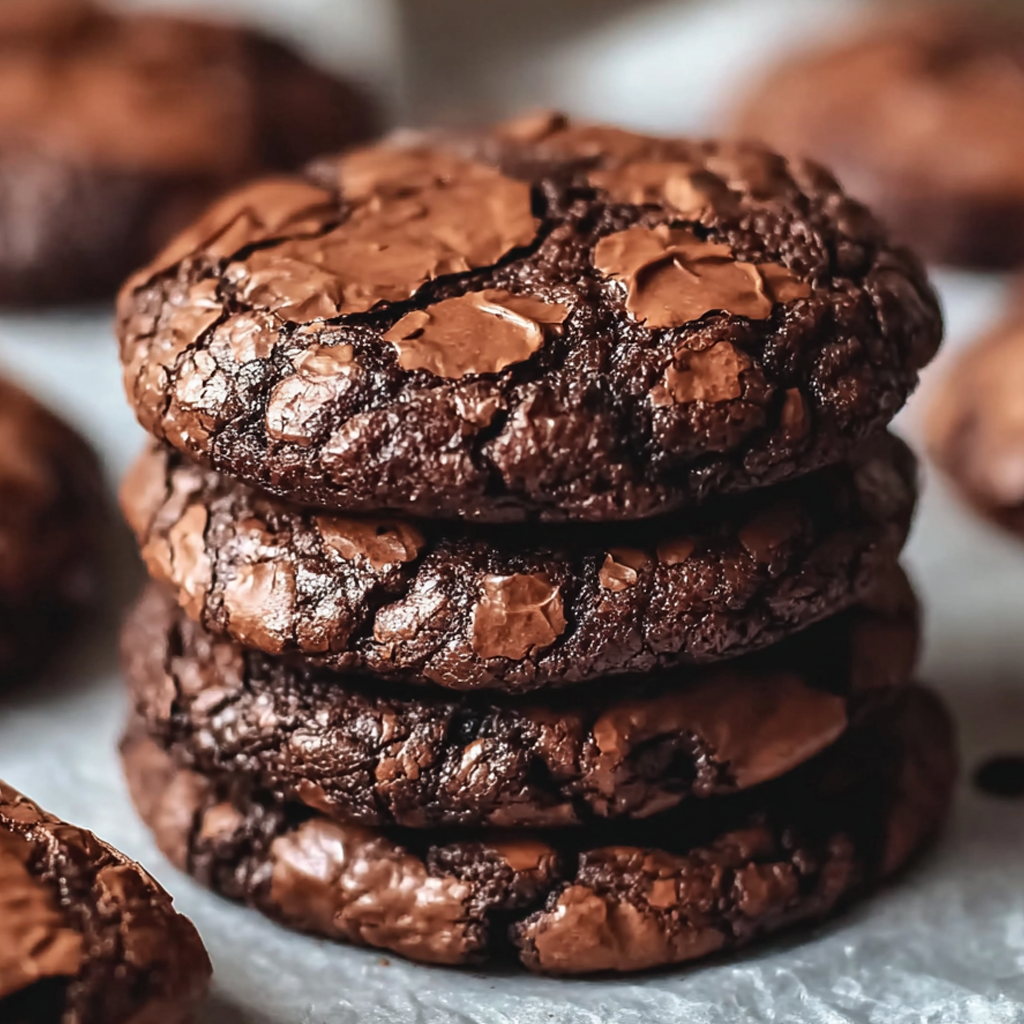
Hello, cookie lovers! If you’re like me and have a soft spot for rich, chocolatey goodness, then you’re in for a real treat today. I’m here to share one of my all-time favorites—Fudgy Brownie Cookies! Imagine biting into a chewy cookie that tastes just like a brownie; it’s pure bliss! What I love about this recipe is how incredibly simple it is and how quick the result is—a plate of warm, gooey chocolate cookies that will wow your family and friends. Ready to dive in? Let’s get baking!
Nutritional Benefits of Fudgy Brownie Cookies
Now, let’s chat about those little ingredients and what they bring to your cookie party! While these cookies are indeed a treat, they do have some surprising nutrition. For starters, cocoa powder is full of antioxidants that can give your mood a little boost. Cocoa is even linked to improving heart health (in moderation, of course!). Plus, if you opt for nuts, like walnuts or pecans, you’re adding a nice dose of healthy fats and protein, making your cookie a little bit more nutritious. Who doesn’t like a sneaky health benefit in their dessert?
Fun Variations to Try
Wanna shake things up a bit? Here are a few fun variations to make these Fudgy Brownie Cookies truly your own:
- Mint Chip Delight: Add a few drops of mint extract into the batter for a refreshing twist, and swap the chocolate chips for mint chocolate chips!
- Spicy Surprise: Add a pinch of cayenne pepper or chili powder to the batter. You’ll get a delightful kick that pairs perfectly with chocolate!
- Nutty Goodness: Experiment with different nuts, like hazelnuts or macadamias, to find your favorite flavor combination.
- Salted Caramel Filling: Place a small dollop of caramel sauce in the center of each cookie before baking for an indulgent surprise.
Delicious Fudgy Brownie Cookie Recipe
Ingredients
- 1 cup (200g) granulated sugar
- ½ cup (100g) light brown sugar, packed
- ½ cup (1 stick, 115g) unsalted butter, melted
- 2 large eggs
- 1 teaspoon vanilla extract
- 1 cup (130g) all-purpose flour
- ½ cup (50g) unsweetened cocoa powder
- ½ teaspoon baking powder
- ¼ teaspoon salt
- 1 cup (170g) semi-sweet chocolate chips
- Optional: ½ cup (90g) chopped nuts (like walnuts or pecans) for added texture
Step-by-Step Instructions
- Preheat the Oven: Start by preheating your oven to 350°F (175°C) and then line a baking sheet with parchment paper. This helps keep the cookies from sticking!
- Mix Sugars and Butter: In a large mixing bowl, combine your granulated sugar, light brown sugar, and melted butter. Mix them together until it’s nice and smooth; this will give your cookies that chewy texture!
- Add Eggs and Vanilla: Crack in the eggs one at a time and mix well after each addition. Add in the vanilla extract next and give it another good stir until everything is well mixed.
- Combine Dry Ingredients: Grab another bowl and whisk together your flour, cocoa powder, baking powder, and salt. This ensures even distribution and keeps your cookies from ending up lumpy.
- Mix Wet and Dry Ingredients: Slowly pour the dry ingredients into the wet ones, stirring gently. Be careful not to over-mix—this is key to keeping those cookies chewy!
- Add Chocolate Chips and Nuts: Now comes the best part! Gently fold in the chocolate chips and the optional nuts if you choose to use them, making sure they’re evenly spread through the dough.
- Scoop the Dough: Using a cookie scoop or just a tablespoon, drop generous portions of the dough onto your prepared baking sheet, leaving about 2 inches in between each scoop.
- Bake the Cookies: Place your baking sheet into the oven and bake for about **10-12 minutes**. Remember, they should look slightly underbaked when you take them out—they’ll firm up as they cool.
- Cool the Cookies: Let the cookies sit on the baking sheet for about 5 minutes before transferring them to a wire rack to cool completely. This waiting period is oh-so-important!
- Serve and Enjoy: Once your cookies are cooled, grab a glass of milk and dig in! There’s nothing quite like these rich, chewy, ultra-chocolatey bites.
Valuable Tips for Baking Success
- If you want your cookies to come out perfectly round, use a spatula to gently push the edges into shape right after they come out of the oven.
- For a deeper chocolate flavor, consider adding an extra tablespoon of cocoa powder, but reduce the flour slightly to maintain the balance.
- Store leftover cookies in an airtight container at room temperature—if you have any leftover, that is!
- To ensure even baking, bake one tray at a time in the center of the oven rather than stacking two trays on top of each other.
- If you want to make ahead, you can freeze the cookie dough. Just scoop it onto a tray and freeze until firm, then store in an airtight bag and bake directly from frozen for a quick treat!

Equipment Needed
Before you start baking, here’s a little checklist of equipment that will make the process smoother:
- A large mixing bowl for blending your delicious ingredients
- A whisk or spatula for mixing
- A separate bowl for your dry ingredients
- A cookie scoop or tablespoon to portion out your dough
- A baking sheet lined with parchment paper for easy cleanup
- A cooling rack to let those cookies chill out!
Frequently Asked Questions
- Can I use different types of chocolate chips? Absolutely! Feel free to swap in milk chocolate, white chocolate, or even dark chocolate chips for a different flavor profile.
- How do I know when my cookies are done? They should look set around the edges but still slightly soft in the center. Remember, they’ll continue to firm up once out of the oven!
- Can I substitute the butter for oil? Yes, but know that it will change the texture a little. Butter gives a chewier texture while oil results in a softer cookie.
- Are these cookies gluten-free? You can substitute the all-purpose flour with a gluten-free blend to make them gluten-free! Just make sure your other ingredients are also certified gluten-free.
- How long do these cookies last? If stored in an airtight container, they should stay fresh for about a week. But I bet they’ll be gone before that!
Did you bake these delicious Fudgy Brownie Cookies? I’d love to know how they turned out! Share your cookie photos on Pinterest and tag me so I can see your beautiful creations. Let’s inspire each other to keep baking sweet treats!