Welcome to Cheesy Heaven!
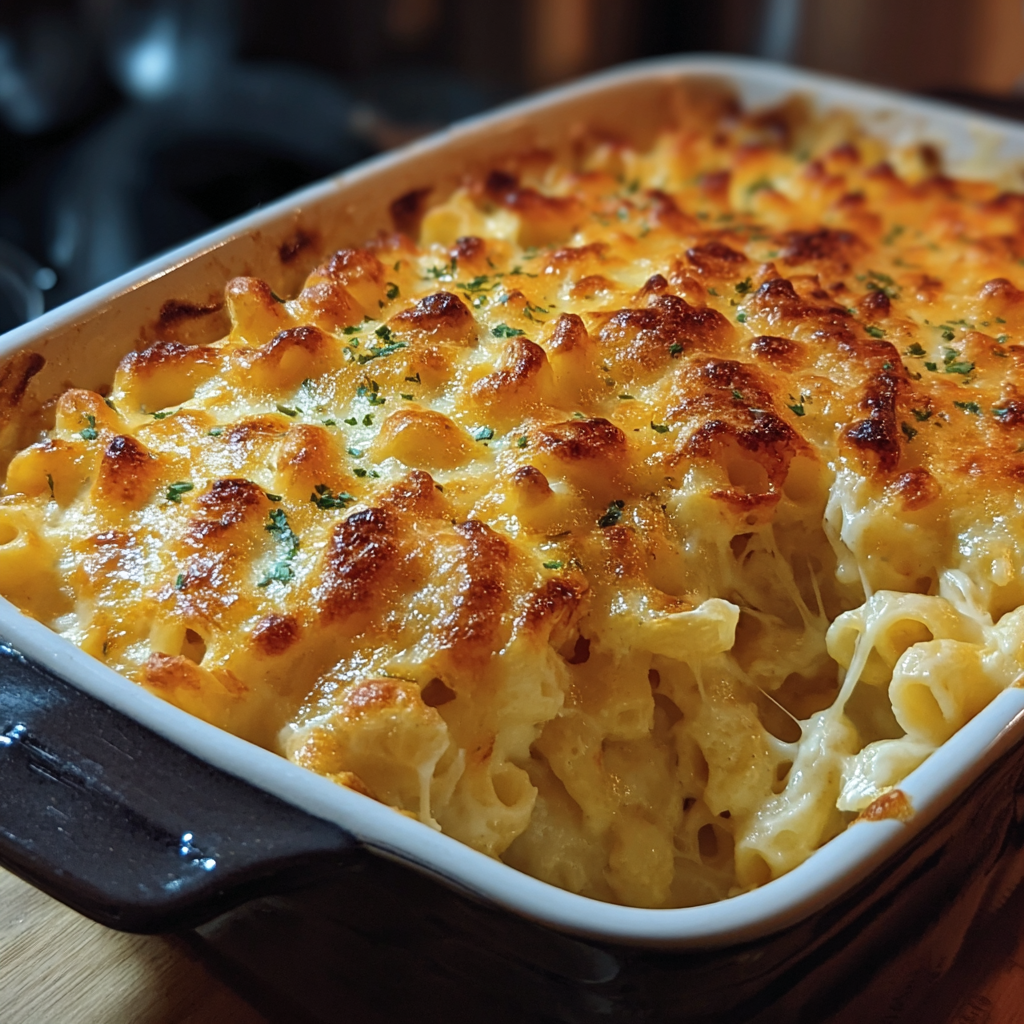
Hey there! If you’re like me, there’s just nothing quite like a warm, creamy baked mac and cheese on a cozy night in. It’s the ultimate comfort food and guaranteed to put a smile on your face! This recipe not only delivers that rich, comforting flavor, but it’s also super easy to make. So, grab your apron, and let’s dive into the world of ultra-cheesy goodness together!
Nutritional Benefits
Now, you might not think of mac and cheese as a health food, but let’s talk about some awesome benefits! First off, it has protein from the cheese, and let’s not forget the energy-boosting carbohydrates from the pasta. Plus, if you sneak in some greens like broccoli or spinach, you’ll add fiber and vitamins too. So, you can enjoy your cheesy dish while getting a few nutrients in there — your secret little win!
Fun Variations to Make
Want to switch things up? Here are some ideas to personalize your mac and cheese:
- Add Some Veggies: Toss in steamed broccoli, peas, or even roasted red peppers to make it a bit healthier and colorful!
- Spicy Kick: Want a little heat? Mix in some diced jalapeños or a sprinkle of cayenne pepper to spice things up.
- Different Cheeses: Experiment with other cheeses like gouda or pepper jack for unique flavors. The possibilities are endless!
- Protein Power: Adding crumbled bacon or shredded chicken can turn this into a hearty meal!
Your Easy, Ultra-Cheesy Baked Mac and Cheese Recipe
Ingredients
- 2 cups elbow macaroni
- 4 cups shredded sharp cheddar cheese
- 1 cup shredded mozzarella cheese
- 1 cup grated Parmesan cheese
- 3 tablespoons unsalted butter
- 3 tablespoons all-purpose flour
- 4 cups whole milk
- 1 teaspoon garlic powder
- 1 teaspoon onion powder
- 1 teaspoon Dijon mustard
- Salt and pepper to taste
- 1/2 cup breadcrumbs (optional for topping)
- Fresh parsley for garnish (optional)
Instructions
- First things first, preheat your oven to 350°F (175°C). Then, grab a large baking dish and give it a little grease to keep things non-stick.
- In a big pot, bring some water to a boil. Toss in a pinch of salt, and then cook your elbow macaroni according to the package until it’s al dente. Once done, drain it and set aside.
- Now, let’s make that creamy sauce! In the same pot, melt the butter over medium heat. When it’s all melted, stir in the flour to create a roux. Let it cook for a minute or two until it’s nice and golden.
- Gradually whisk in the whole milk, making sure there are no lumps. Keep whisking until the mixture thickens and achieves a creamy texture—this should take about 5-7 minutes.
- Once thick enough, reduce the heat to low, and stir in the garlic powder, onion powder, Dijon mustard, salt, and pepper.
- Now here comes the cheesy part! Slowly add both the shredded cheddar and mozzarella cheese to the mixture, stirring continuously until everything is melted and smooth.
- Gently toss the drained macaroni with the cheese sauce, mixing it up well so every piece of pasta is coated in that creamy goodness.
- Pour your mac and cheese mixture into the greased baking dish. If you’re feeling fancy, sprinkle some breadcrumbs on top for that delicious crunch.
- Don’t forget the finishing touch! Top it off with the remaining grated Parmesan cheese for that golden, cheesy crust.
- Slide your dish into the oven and bake for 25-30 minutes. You’re looking for a bubbly, golden top to show that it’s perfectly baked!
- Once it’s out of the oven, let it cool for just a minute before garnishing with parsley, if desired.
- Dig in while it’s warm, and enjoy the cheesy dream you’ve just created!
Practical & Valuable Tips
- For a creamier texture, consider adding an extra splash of milk just before serving if it thickens too much.
- Leftovers? Store them in an airtight container in the fridge for up to 3 days, and reheat them in the microwave or oven for best results.
- If you want to freeze it, let it cool completely before covering and freezing—just remember to reheat thoroughly before digging in!
- Feeling adventurous? Experiment with different pasta shapes—cavatappi or penne work great too!
Equipment Needed
Here’s what you need to whip up this mac and cheese:
- A large pot for boiling macaroni
- A baking dish (9×13 inches is perfect)
- A whisk for mixing your cheese sauce
- A spatula for combining
- A measuring cup for those precise amounts
- Aluminum foil (if you want to cover it while it bakes)
Frequently Asked Questions
- Can I use gluten-free pasta? Absolutely! Just follow the cooking instructions on the package for the best results.
- What can I substitute for whole milk? You can use 2% milk or half-and-half for a creamier sauce, or even almond milk in a pinch!
- How do I keep my mac and cheese from getting dry when reheating? A little splash of milk when reheating will help keep it moist and creamy.
- How can I make this dish lighter? You can use low-fat cheese and skim milk, and maybe incorporate more veggies to balance it out!
- Can I make this ahead of time? Yes! Prepare the entire dish without baking, cover it tightly, and then bake it just before serving.
Let’s Connect!
Once you try this comforting dish, please let me know how it turns out! I’d love to hear your thoughts or any adaptations you make. Share your culinary adventures with me on Pinterest — we can inspire each other with delicious recipes! Happy cooking!