Welcome to My Kitchen!
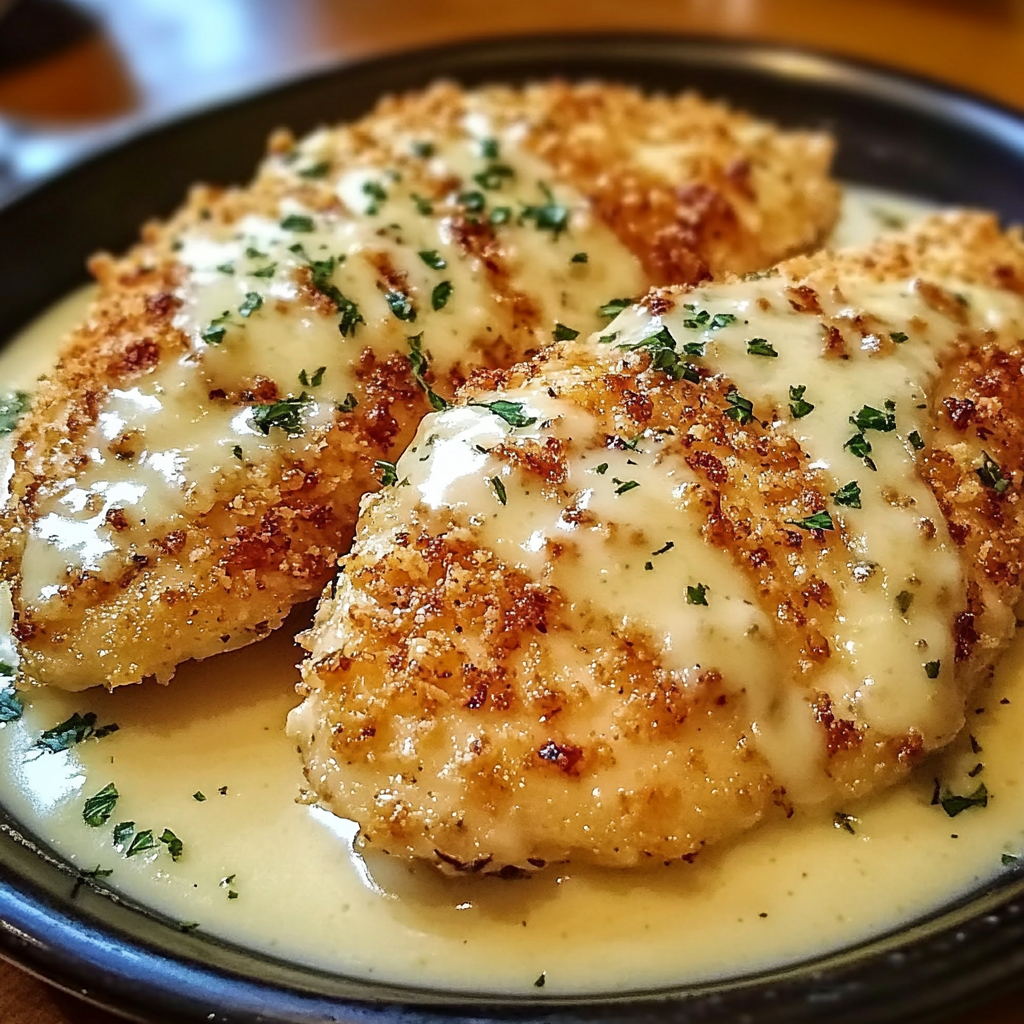
Hey there, friend! If you’re looking to whip up something that screams comfort food with a touch of elegance, you’ve landed in the right spot. I’m excited to share my version of the Copycat Longhorn Steakhouse Parmesan Crusted Chicken with you! This dish is fantastic for dinner parties, family meals, or simply treating yourself after a long day. Trust me, once you taste it, you’ll wonder why you ever went out for dinner!
Nutritional Benefits of This Dish
Let’s talk about what’s on your plate! Chicken is a fantastic source of lean protein, which is great for building muscles and keeping you feeling full. Parmesan cheese not only adds a delicious flavor but also provides calcium for your bones. And if you decide to pair this dish with steamed veggies, you’re stacking up on vitamins and minerals too. So not only is this meal comforting, but it also nourishes your body!
Adaptable Variations
The beauty of this recipe is that it’s super adaptable! Here are a couple of suggestions:
- If you’re gluten-free: You can swap out the all-purpose flour for a gluten-free blend and use gluten-free breadcrumbs. It works amazingly well!
- For a spicy kick: Add some crushed red pepper flakes or cayenne pepper to the breadcrumb mixture to amp up the heat!
- For a lighter version: You can bake the chicken instead of frying by brushing it with olive oil and placing it in a preheated oven at 400°F (200°C) for about 20 minutes or until it reaches that glorious golden state.
Delicious Parmesan Crusted Chicken Recipe
Ingredients
- 2 boneless, skinless chicken breasts
- 1 cup all-purpose flour
- 2 large eggs
- 1 cup breadcrumbs (preferably panko for extra crunch)
- 1 cup grated Parmesan cheese
- 1 teaspoon garlic powder
- 1 teaspoon onion powder
- 1 teaspoon salt
- 1/2 teaspoon black pepper
- 1/4 teaspoon paprika
- 1/4 cup butter (for frying)
- 1/2 cup heavy cream
- 1/4 cup chicken broth
- 1 cup shredded mozzarella cheese
- Fresh parsley (for garnish)
Instructions
- Prepare the Chicken: Start by placing the chicken breasts between two sheets of plastic wrap or parchment paper. Grab a meat mallet or a rolling pin, and pound them to an even thickness of about 1/2 inch. This helps them cook evenly—no one wants a dry piece of chicken!
- Set Up Breading Station: Now, let’s set the stage for our chicken! In three separate shallow dishes, do the following:
- In the first dish, mix the flour with salt, black pepper, garlic powder, and onion powder.
- In the second dish, whisk the eggs until nicely combined.
- In the third dish, mix together the breadcrumbs and grated Parmesan cheese. Yum!
- Bread the Chicken: Time to get messy in the best way! Dip each chicken breast into the seasoned flour first, making sure to shake off any excess. Then, dip it into the beaten eggs, letting any extra drip off. Finally, roll it in the breadcrumb and Parmesan mixture, pressing down slightly to ensure it sticks. You want that crispy goodness!
- Cook the Chicken: In a large skillet, melt the butter over medium heat. Grab your breaded chicken and place it in the hot skillet. Cook for about 4-5 minutes on each side until they are golden brown and cooked through. You can check the internal temperature; it should reach 165°F (74°C). Transfer the chicken to a plate when done.
- Make the Cream Sauce: In the same skillet, pour in the heavy cream and chicken broth, scraping up any delicious browned bits stuck on the bottom. Let it simmer for 2-3 minutes to thicken up a bit.
- Add Cheese: Stir in the shredded mozzarella cheese until it melts smoothly into the sauce. Give it a taste and adjust the seasoning with salt and pepper if you like.
- Final Assembly: Place your cooked chicken breasts back into the skillet and generously spoon that creamy cheese sauce over the top. Let it soak in for a minute—trust me, this makes a difference!
- Garnish and Serve: Once you’ve removed it from the heat, sprinkle some fresh parsley on top. Serve immediately—this goes perfectly over a bed of pasta, rice, or with some steamed veggies. Dig in and enjoy your restaurant-style dinner right at home!
Practical & Valuable Tips
- For extra crunch, consider double-dipping your chicken in the egg and breadcrumb stages.
- If you have leftovers (which is rare!), store them in an airtight container in the fridge. Reheat in the oven for best results!
- This dish pairs beautifully with a side salad, or sautéed green beans for a pop of color and nutrients.
Equipment You’ll Need
Before you get started, here’s a quick list of tools that will make your cooking experience smoother:
- A meat mallet or rolling pin
- Three shallow dishes (for your breading station)
- A large skillet for frying
- A whisk for mixing the eggs
- A spatula for flipping the chicken
Frequently Asked Questions
- Can I bake the chicken instead of frying it? Yes, for a lighter option, you can bake it at 400°F (200°C) until golden brown!
- Can I use a different type of cheese? Absolutely! You can experiment with provolone, cheddar, or even a bit of feta for a different flavor twist!
- What should I serve with this dish? It goes wonderfully with garlic mashed potatoes, rice, or a crisp green salad!
- Can I prepare this ahead of time? Yes, you can bread the chicken earlier in the day and store it in the fridge until you’re ready to cook!
- How do I keep the chicken crispy? Serve immediately after cooking, and avoid covering it, as that can make the coating soggy.
Let’s Stay Connected!
So there you have it! A delicious, crowd-pleasing recipe that will surely impress. If you try this dish, I’d love to hear how it turned out for you! Snap a picture and tag me on Pinterest or your favorite social media and let’s share those yummy cooking moments together!